When it comes to sewing, precision is key. One of the most essential sewing tools for achieving that precision is sewing marking chalk. Whether you are a novice or an experienced tailor, understanding how to use tailor chalk can significantly enhance your sewing projects. In this guide, we will explore the different types of marking chalk, their benefits, and tips for using them effectively.

What is Sewing Marking Chalk?
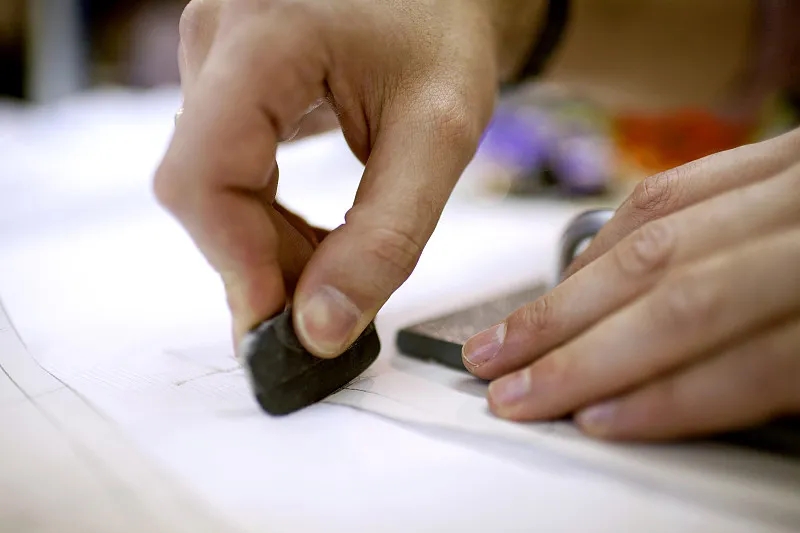
Sewing marking chalk is a specialized tool used to mark fabric for cutting, sewing, and alterations. Unlike regular chalk, which can leave a permanent mark on clothing, tailor chalk is designed to be temporary. It can easily be brushed away or washed out, making it ideal for delicate fabrics.
Types of Sewing Marking Chalk
There are several types of tailor chalk available, each suited for different fabrics and purposes:
- Traditional Tailor Chalk: This is the most common form, shaped like a triangle or rectangle. It’s available in various colors to contrast with different fabrics.
- Chalk Pencils: Ideal for finer details, chalk pencils provide precision in marking. They are perfect for intricate patterns or small measurements.
- Chalk Markers: These come in various colors and often feature a fine tip, making them excellent for detailed work. Some markers are even water-soluble, allowing for easy removal.
- Chalk Wheels: This tool dispenses chalk as you roll it along the fabric, making it quick and efficient for larger areas.
Why Every Beginner Needs Sewing Marking Chalk
For beginners, using sewing marking chalk can greatly enhance the sewing experience. Here are a few reasons why it’s essential:
1. Accuracy in Measurements
Marking with chalk ensures that all your measurements are accurate. Whether you are cutting fabric or sewing seams, having a visible and clear line to follow is crucial for achieving professional-looking results.
2. Versatility Across Fabrics
Sewing marking chalk can be used on various types of fabric, from cotton to silk. This versatility makes it an indispensable tool in your sewing kit.
3. Easy to Use and Remove
One of the biggest advantages of tailor chalk is its easy application and removal. This means you can make adjustments without worrying about permanent marks on your fabric.

Tips for Using Sewing Marking Chalk
To make the most of your sewing tools, here are some helpful tips for using sewing marking chalk effectively:
Use the Right Chalk for Your Fabric
Choosing the correct type of chalk for your fabric is essential. For lightweight fabrics, opt for chalk pencils or fine markers. For heavier fabrics, traditional tailor chalk works well.
Test on Scrap Fabric
Before marking your actual fabric, always test the chalk on a scrap piece. This will help you ensure that it will wash out easily and not leave any residue.
Mark in Good Lighting
Make sure to work in a well-lit area to see your chalk marks clearly. This will help you make accurate cuts and stitches.
Common Mistakes to Avoid
While using sewing marking chalk can be straightforward, beginners often make a few common mistakes:
- Over-marking: Too much chalk can make it difficult to see your patterns. Use light, precise lines instead.
- Ignoring Fabric Type: Always consider the fabric’s texture and color when choosing your chalk. Using the wrong type can lead to marks that are hard to remove.
- Neglecting to Remove Marks: Always remember to remove your chalk marks after your sewing project is complete to keep your fabric looking fresh.
Conclusion
In conclusion, sewing marking chalk is an invaluable tool for anyone starting their sewing journey. By understanding its various types and mastering its use, beginners can create perfect patterns and elevate their sewing skills. Remember, the right sewing tools can make all the difference in achieving the results you desire.